

Notion requires authenticated MCP — CoinGecko API key is needed.
Setup
1
Create an AI agent
Open Notion and navigate to AI Agents (or click + New agent from the sidebar). Describe what your agent should do.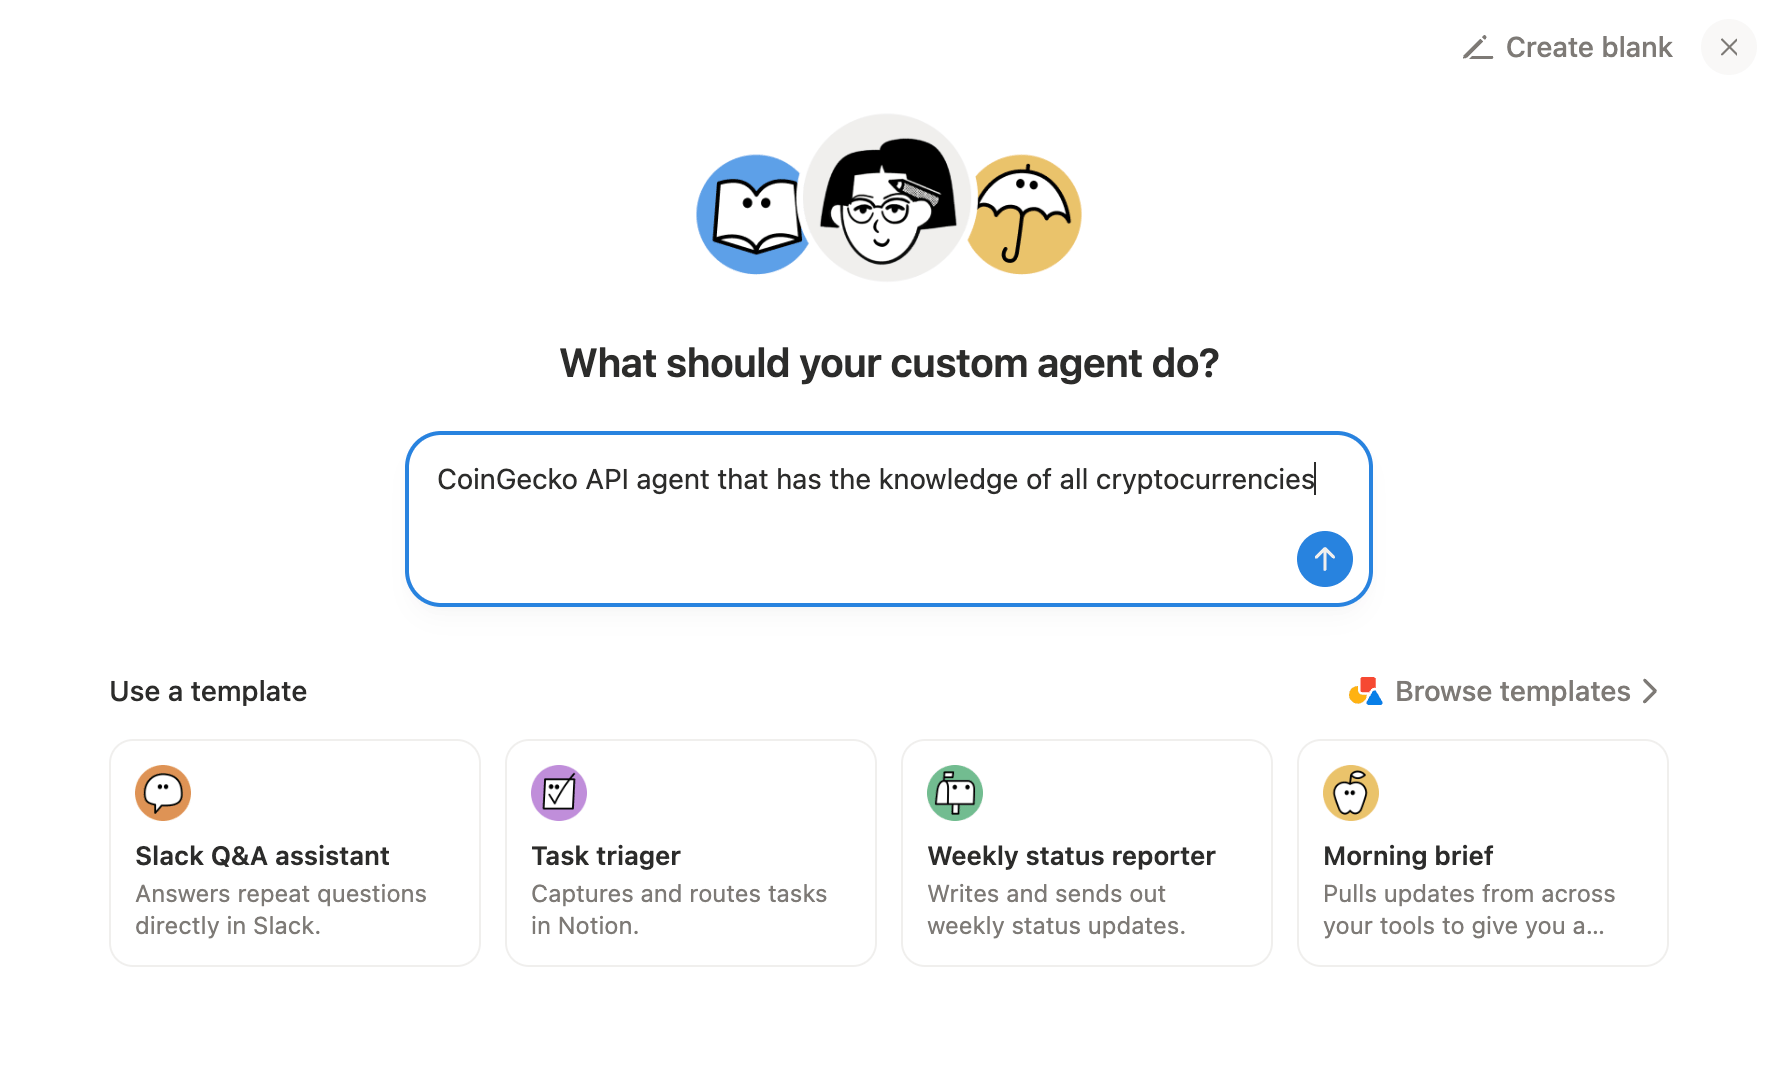
2
Add MCP connection
In your agent’s settings, click Add connection. Scroll to the bottom of the left sidebar and click + Add custom MCP.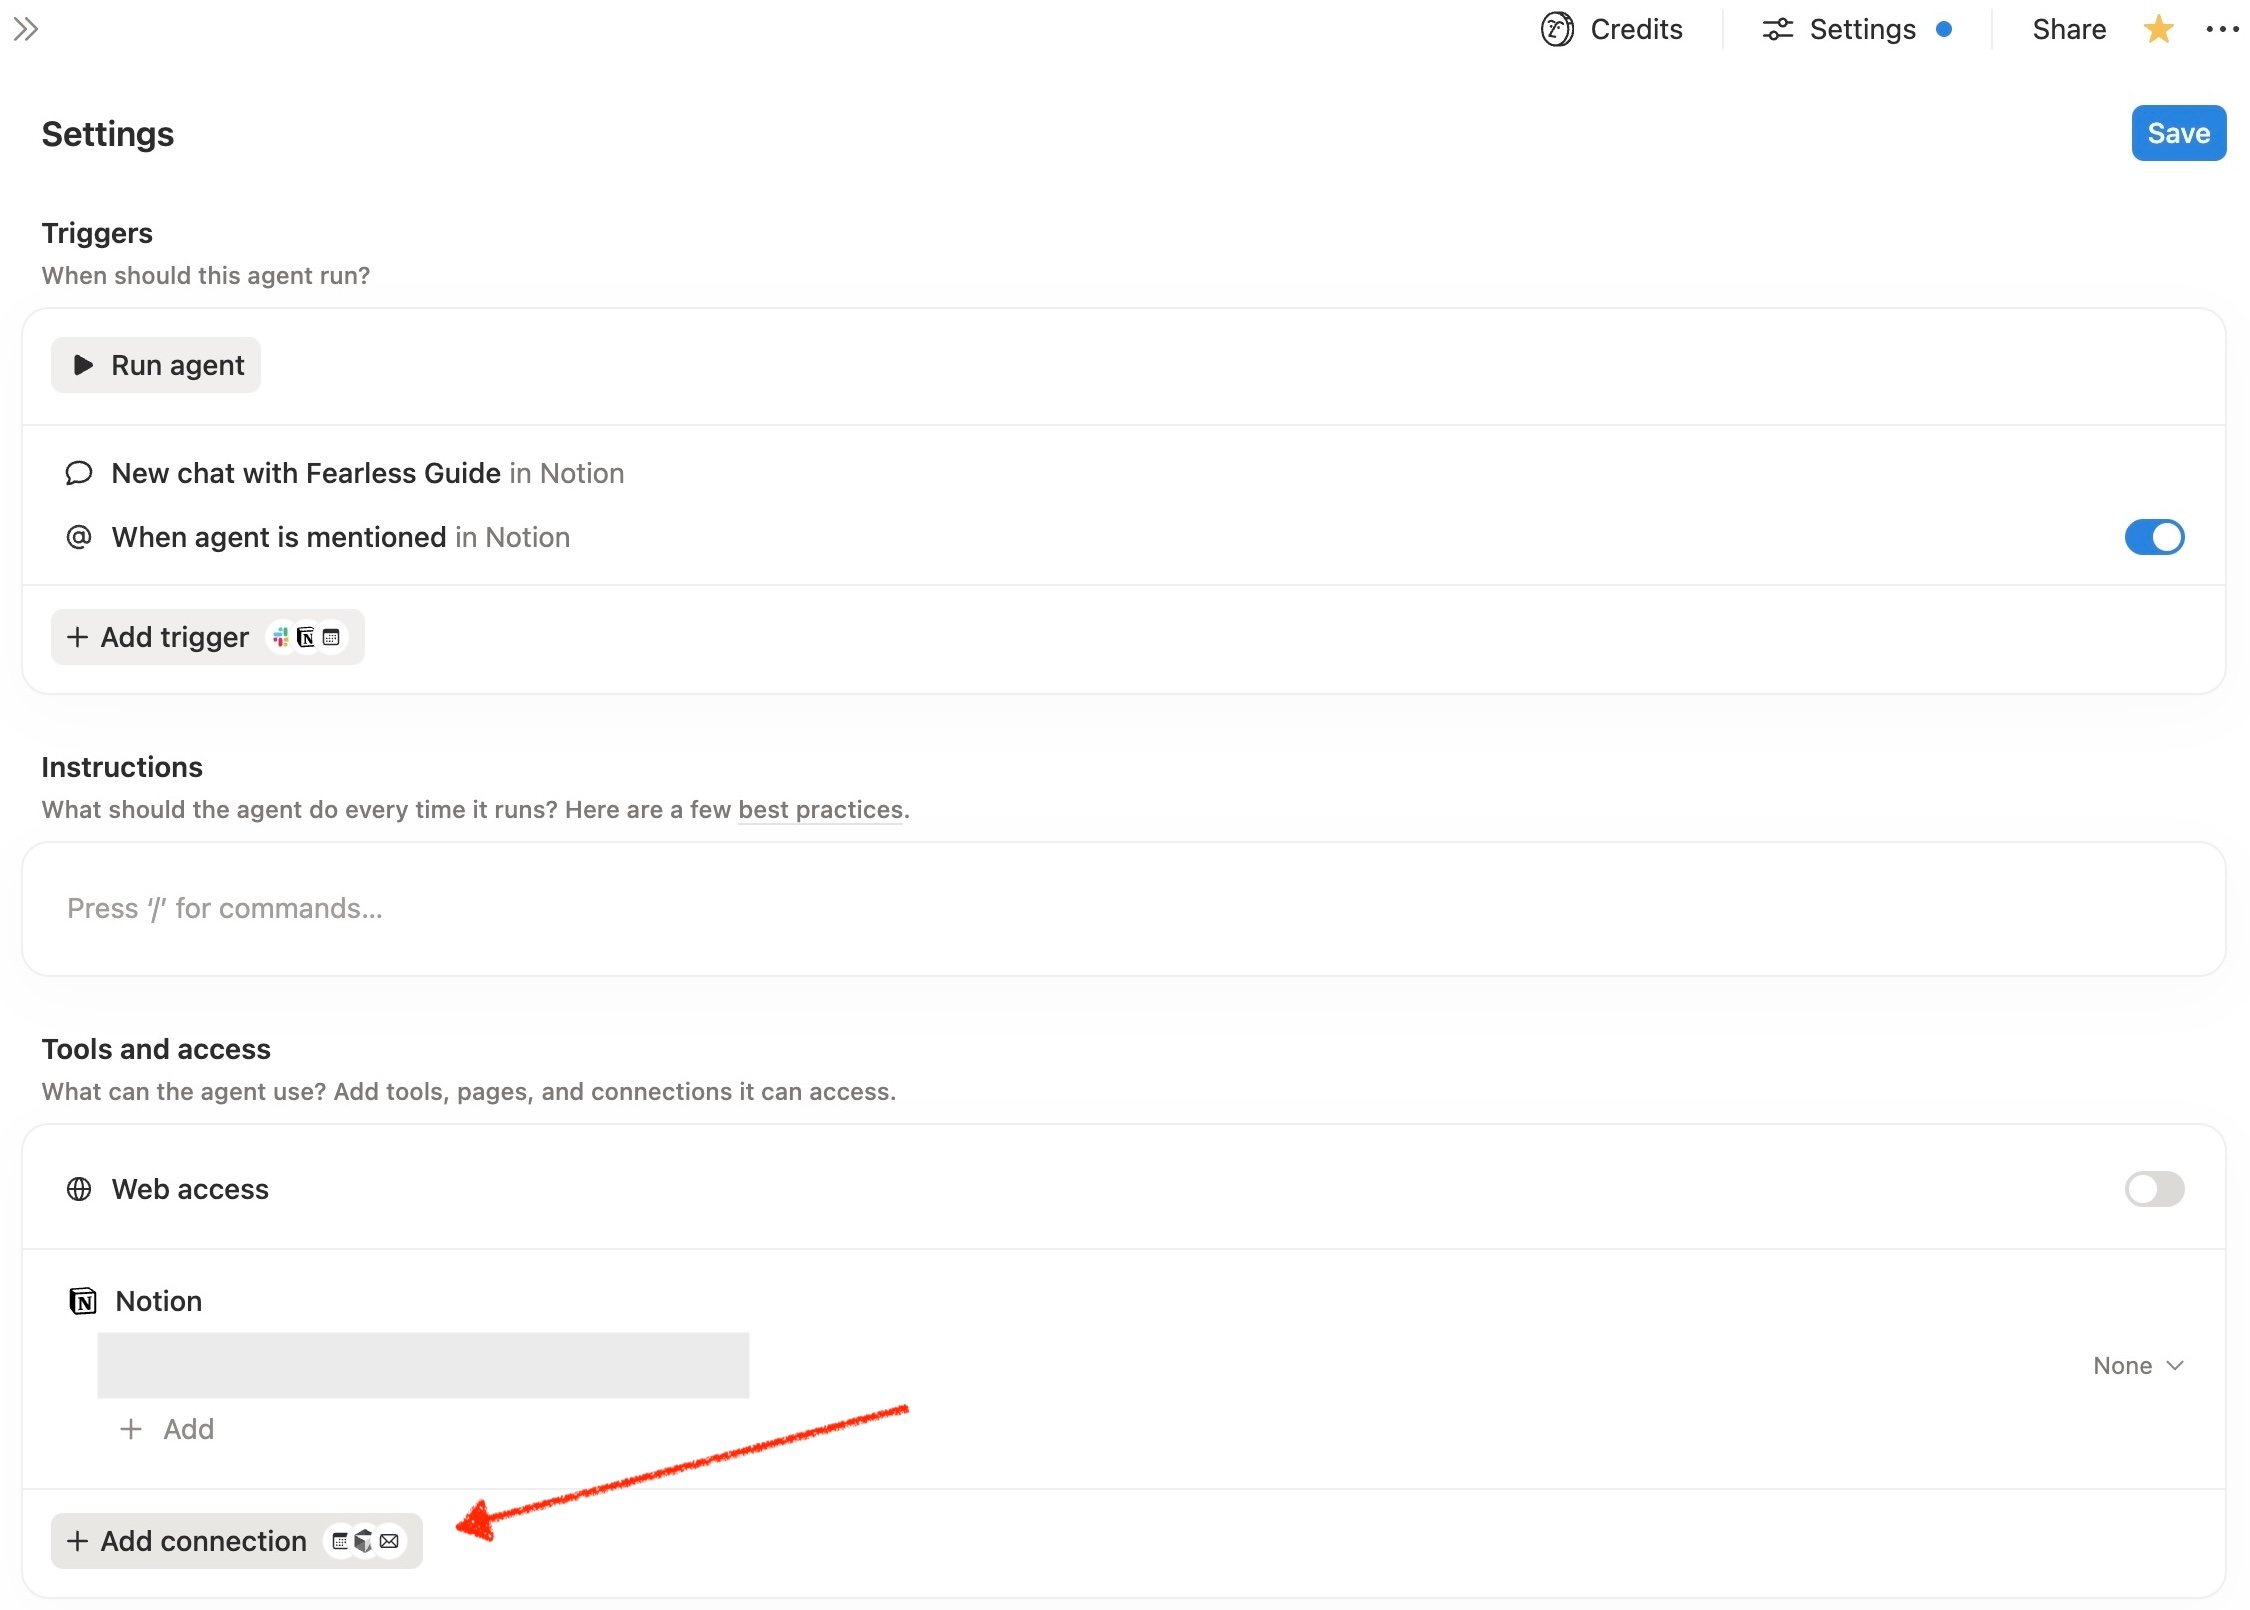
3
Configure the MCP server
Fill in the connection form: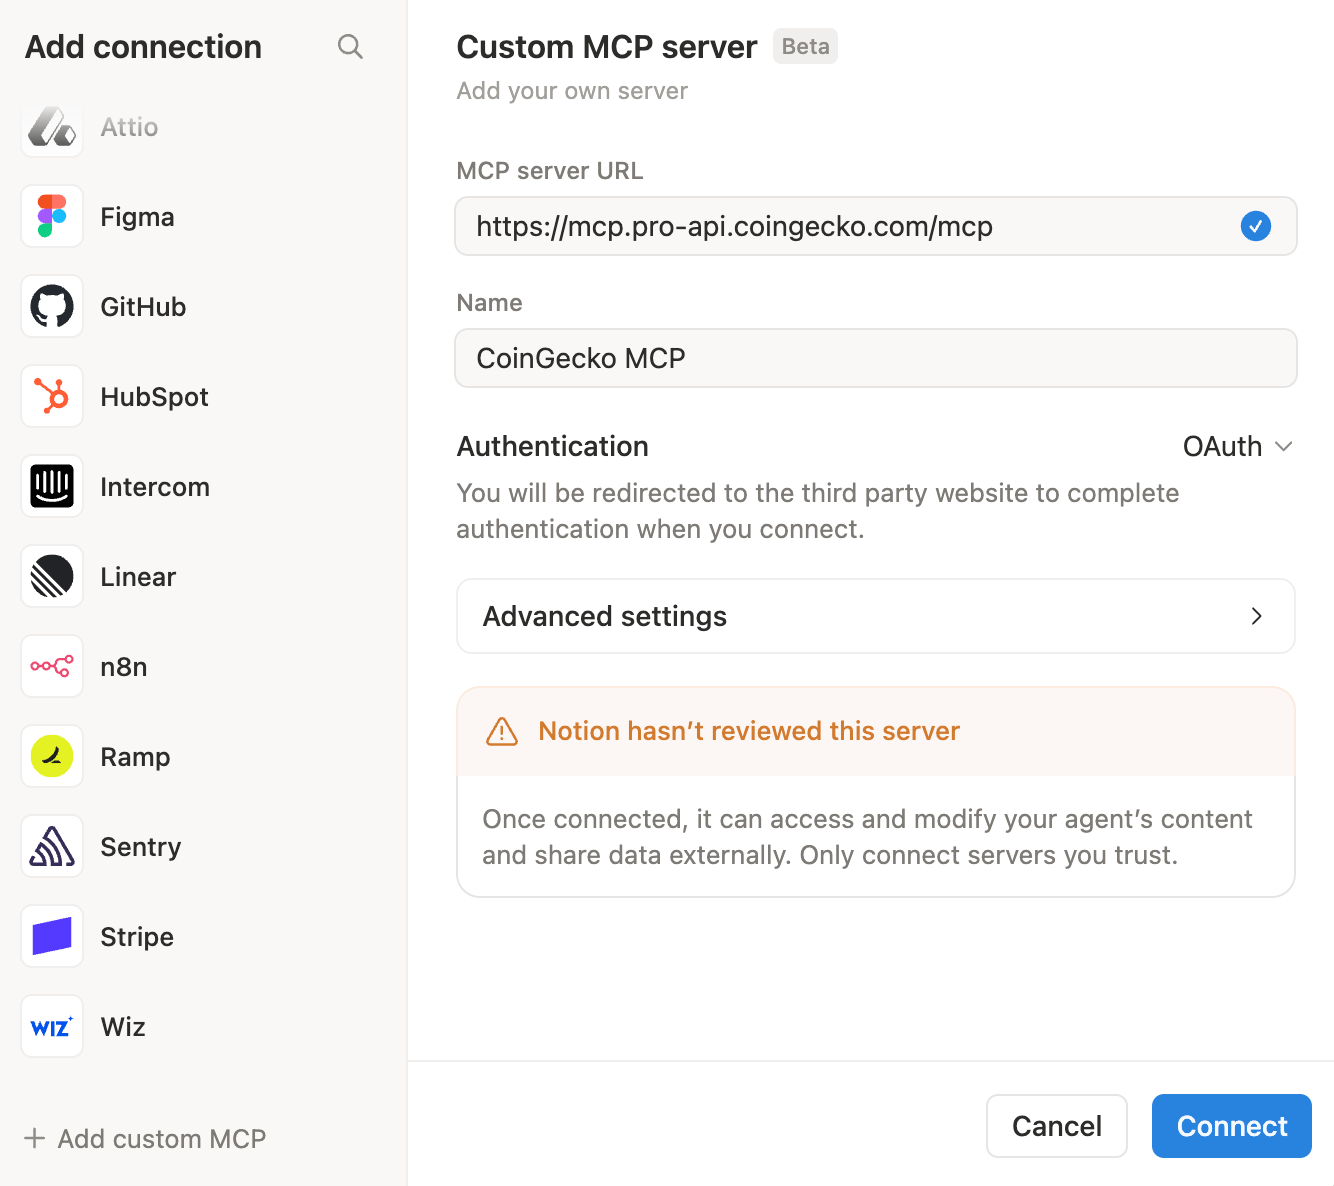
Notion displays a warning: “Notion hasn’t reviewed this server.” This is expected for all custom MCP servers.Click Connect.
4
Authorize with your API key
A browser tab opens at
mcp.pro-api.coingecko.com/authorize. Paste your API key and click Log in and Approve.Get a key at coingecko.com/en/api/pricing.
Try It Out
Your Notion AI agent now has access to live CoinGecko data. Try these prompts:- “What is the current price of Bitcoin in USD?”
- “Show me the top 10 cryptocurrencies by market cap with price, 24h change, and volume in a table.”
- “What are the top trending coins on CoinGecko right now?”
- “Research the top 5 DeFi coins and save a summary to this page.”
- “Pull today’s trending coins and add them as a database entry.”
Troubleshooting
'Notion hasn't reviewed this server' warning
'Notion hasn't reviewed this server' warning
This appears for all custom MCP connections and is not an error. Safe to proceed.
Agent returns no crypto data
Agent returns no crypto data
Confirm the MCP connection is active in your agent’s settings. Re-authorize if your session has expired.